

What the f*ck is Node.JS? - A Complete Tutorial
Node.js is an open-source and cross-platform JavaScript runtime environment.


"Node.js is an open-source and cross-platform JavaScript runtime environment." This sounds like a cool, straightforward answer. But for a beginner, this definition might raise further questions. So let's break it down and understand what it means.
Open Source: Think of Node.js as a big treasure box that's open for everyone to peek inside. Lots of smart people from all over the world gather together to put amazing ideas and secret codes into this box. They share everything, so we all learn and make it even better!
Cross Platform: Imagine Node.js is like a friendly ghost that can go anywhere without any problem. It can play happily with any type of computer, whether it's Windows, Mac, or Linux. It's like having a special friend that works on all computers!
JavaScript Runtime Environment: Alright, this one's a bit tricky, but don't worry—I've got your back! You know how when you write a super cool recipe, it won't turn into a tasty cake unless you put it in the oven? Well, the oven is like the magic place where your recipe comes to life! Node.js is that magical oven for JavaScript codes. It takes your cool codes and makes them do amazing things outside of just web browsers!
And guess what? Node.js was created by a coding wizard named Ryan Dahl, and it all started in 2008. But hey, we don't need to remember all that! What's important is that Node.js helps us do magical coding and create fantastic things on our computers!
So grab your coding wand (a.k.a. your computer), and let's explore the enchanting world of Node.js together! With Node.js, you can cast coding spells and make your very own awesome web applications!
01 . Node.JS versus Browsers 🥊
If browsers can run JavaScript code, why do I need Node.JS? Ah, the epic battle between browsers and Node.js! It's like a magical showdown between two powerful wizards—both capable of casting JavaScript spells, but each with unique strengths! Let's uncover their secrets in a way that even Merlin would appreciate! 🧙♂️🔮
Browser Magic: Imagine browsers as the guardians of a splendid castle called the Document Object Model (DOM). They hold the keys to the kingdom of web pages and can perform all sorts of enchanting operations inside that castle! But, alas, browsers don't know much about the outside world beyond their castle walls.
Node.js Sorcery: Now, Node.js is like a cunning trickster who knows the secrets of the entire kingdom! It can interact with the operating system, access files, and do all kinds of fantastic stuff outside of the castle. But, it doesn't have access to the magical DOM castle like the browsers do.
Window and Global Wizards: Browsers call their magical global object the "window," where they keep special methods and properties for their castle. On the other hand, Node.js has its special global object called "global," where it stores its secrets!
But wait, there's more! With Node.js, you have the incredible power to choose the version of JavaScript you want to use for your server-side spells. You can wield modern JavaScript features without worrying about any pesky version conflicts! But in the browser, you can't control which version your visitors use to view your magical web app.
So, whether you're in the browser castle, working with the DOM, or outside in the vast realm of Node.js, tinkering with the entire kingdom, remember that both wizards have their unique strengths! Use them wisely, and you'll be a coding wizard capable of crafting extraordinary web experiences for all to behold!
02 . Why should you learn Node.JS? 🥷
Oh, buckle up, my fellow coding adventurer! Node.js is like a treasure chest filled with amazing gems, and here are just a few dazzling jewels to get you excited:
One JavaScript to Rule Them All: Imagine having a superpower that lets you speak the same language with both the front and back of your app! With Node.js, you can work your coding magic using JavaScript for both the client (that's the front-end) and the server (that's the back-end). No need to learn new languages from scratch—you've got JavaScript, your trusty spellbook, to conquer it all!
Google's Blessing: Picture this—the heart of Node.js beats with the Chrome V8 engine, which powers Google's in-browser wonders like Gmail! And guess what? Google loves Node.js so much that they invest lots of magic to keep it super fast and powerful. You're riding on a magic carpet powered by the giants of tech!
The Magical NPM Library: Behold the treasure trove called NPM—a magical library with over a million packages! Each package is like a spell scroll that contains reusable code. It's like having a whole shelf of powerful potions at your fingertips! Mix and match these packages to create your very own coding concoctions.
Now that we're on the edge of our seats, let's grab our wands (or keyboards) and start our Node.js adventure! We'll summon this incredible power to create our very own "Hello World" program! Get ready to cast your spell, and soon you'll be conjuring web wonders like a true coding wizard!
03 . Getting Started with Node.JS 🧑💻
Let's see how you can create your first Node.js application. This section will show you how to run Node.js scripts from the command line.
- Installation
First, you need to download and install Node.js. There are different ways you can do that. If you are a beginner, I would suggest that you download Node.js from the official website. Here is the link to the official website: https://nodejs.org/en/download
Official packages are available on the website for all major platforms (Windows, macOS, and Linux). Download and install the appropriate package for your system.
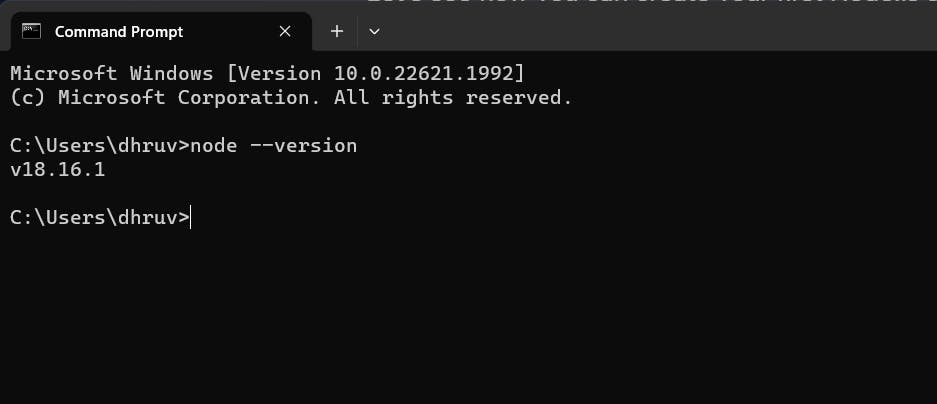
- Verifying Installation
To check the Node.js version, run the command node --version in your terminal. If the installation was successful, you will see the version of Node.js you installed. You should get a response like the screenshot below.
- Creating a Hello World Application
Let's build a simple Hello World app.
Create a new project folder. You can call it my-project. Open the project in your code editor. Inside the folder, create a app.js file.
Add the following code to app.js
console.log("Hello World")
As you can see, this is JavaScript code.
You can run the script in the command line by running the command node <fileName>. In this case, the file name is app.js.
Run the following command in your terminal to execute the Hello world. program:
node app.js
You should see the string "Hello world." logged in your terminal like so.
04 . Node Modules 🏌️
Consider modules to be the same as JavaScript libraries- a set of functions you want to include in your application.
Node.js has a set of built-in modules which you can use without any further installation. To include a module, use the require() function with the name of the module:
var http = require('http');
Now your application has access to the HTTP module, and is able to create a server:
http.createServer(function (req, res) {
  res.writeHead(200, {'Content-Type': 'text/html'});
  res.end('Hello World!');
}).listen(8080);
You can create your modules and easily include them in your applications. The following example creates a module that returns a date and time object:
exports.myDateTime = function () {
  return Date();
};
Use the exports keyword to make properties and methods available outside the module file. Save the code above in a file called "myfirstmodule.js".
Now you can include and use the module in any of your Node.js files.
var http = require('http');
var dt = require('./myfirstmodule');

http.createServer(function (req, res) {
  res.writeHead(200, {'Content-Type': 'text/html'});
  res.write("The date and time are currently: " + dt.myDateTime());
  res.end();
}).listen(8080);
Notice that we use ./ to locate the module, which means that the module is located in the same folder as the Node.js file. Now we can run the file using node.
node demo_module.js
Now, if you open localhost:8000 in your browser, you will see the current date and time in the browser.
05 . HTTP Module 🧑🍳
Node.js has a built-in module called HTTP, which allows Node.js to transfer data over the Hypertext Transfer Protocol (HTTP). To include the HTTP module, use the require() method:
var http = require('http');
The HTTP module can create an HTTP server that listens to server ports and gives a response back to the client. Use the createServer() method to create an HTTP server:
var http = require('http');

//create a server object:
http.createServer(function (req, res) {
  res.write('Hello World!'); //write a response to the client
  res.end(); //end the response
}).listen(8080); //the server object listens on port 8080
The function passed into the http.createServer() method, will be executed when someone tries to access the computer on port 8080.
Save the code above in a file called "demo_http.js", and initiate the file:
node demo_http.js
Now, if you open localhost:8000 in your browser, you will see Hello World written in the browser.
If the response from the HTTP server is supposed to be displayed as HTML, you should include an HTTP header with the correct content-type:
var http = require('http');
http.createServer(function (req, res) {
  res.writeHead(200, {'Content-Type': 'text/html'});
  res.write('Hello World!');
  res.end();
}).listen(8080);
The first argument of the res.writeHead() method is the status code, 200 means that all is OK, the second argument is an object containing the response headers.
The function passed into the http.createServer() has a req argument that represents the request from the client, as an object (http.IncomingMessage object).
This object has a property called "url" which holds the part of the url that comes after the domain name:
var http = require('http');
http.createServer(function (req, res) {
  res.writeHead(200, {'Content-Type': 'text/html'});
  res.write(req.url);
  res.end();
}).listen(8080);
Save the code above in a file called "demo_http_url.js" and initiate the file:
node demo_http.js
Now, if you go to localhost:8080 in your browser, you will see the following result: "/". However, if you go to localhost:8080/summer in your browser, you will see the following result: "/summer". Similarly, if you go to localhost:8080/dhruv in your browser, you will see the following result: "/dhruv".
There are built-in modules to easily split the query string into readable parts, such as the URL module.
var http = require('http');
var url = require('url');

http.createServer(function (req, res) {
  res.writeHead(200, {'Content-Type': 'text/html'});
  var q = url.parse(req.url, true).query;
  var txt = q.year + " " + q.month;
  res.end(txt);
}).listen(8080);
Now, let's run this file.
node demo_querystring.js
The address localhost:8080/?year=2023&month=December will produce the following result:
2023 December
06 . Node Package Manager 🍩
NPM is a package manager for Node.js packages, or modules if you like. www.npmjs.com hosts thousands of free packages to download and use. The NPM program is installed on your computer when you install Node.js.
A package in Node.js contains all the files you need for a module. Modules are JavaScript libraries you can include in your project.
Downloading a package is very easy. Open the command line interface and tell NPM to download the package you want. Let's download a package called "upper-case".
npm install upper-case
Now we have downloaded and installed our first package! NPM creates a folder named "node_modules", where the package will be placed. All packages you install in the future will be placed in this folder.
Once the package is installed, it is ready to use. Include the "upper-case" package the same way you include any other module:
var uc = require('upper-case');
Create a Node.js file that will convert the output "Hello World!" into upper-case letters:
var http = require('http');
var uc = require('upper-case');
http.createServer(function (req, res) {
  res.writeHead(200, {'Content-Type': 'text/html'});
  res.write(uc.upperCase("Hello World!"));
  res.end();
}).listen(8080);
Let's save this code in a file, say index.js and run it.
node index.js
We can see the output on browser at port 8080 (localhost:8080)
07 . File System 📂
The Node.js file system module allows you to work with the file system on your computer. To include the File System module, use the require() method:
var fs = require('fs');
The fs.readFile() method is used to read files on your computer. Assume we have an HTML file named index.html. Let's create a Node.js file that reads the HTML file, and return the content.
var http = require('http');
var fs = require('fs');
http.createServer(function (req, res) {
  fs.readFile('demofile1.html', function(err, data) {
    res.writeHead(200, {'Content-Type': 'text/html'});
    res.write(data);
    return res.end();
  });
}).listen(8080);
Save the code above in a file called "index.js", and initiate the file:
node index.js
The File System module has two main methods for creating and updating files:
fs.appendFile()fs.writeFile()
The fs.appendFile() method appends specified content to a file. If the file does not exist, the file will be created:
var fs = require('fs');

fs.appendFile('mynewfile1.txt', 'Hello content!', function (err) {
  if (err) throw err;
  console.log('Saved!');
});
The fs.writeFile() method replaces the specified file and content if it exists. If the file does not exist, a new file, containing the specified content, will be created:
var fs = require('fs');

fs.writeFile('mynewfile3.txt', 'Hello content!', function (err) {
  if (err) throw err;
  console.log('Saved!');
});
To delete a file with the File System module, use the fs.unlink() method. The fs.unlink() method deletes the specified file:
var fs = require('fs');

fs.unlink('mynewfile2.txt', function (err) {
  if (err) throw err;
  console.log('File deleted!');
});
To rename a file with the File System module, use the fs.rename() method. The fs.rename() method renames the specified file:
var fs = require('fs');

fs.rename('mynewfile1.txt', 'myrenamedfile.txt', function (err) {
  if (err) throw err;
  console.log('File Renamed!');
});
08 . The Formidable Module🍟
Suppose we want to allow users to upload a file to our website. There is a very good module for working with file uploads, called "Formidable". The Formidable module can be downloaded and installed using NPM:
npm install formidable
After you have downloaded the Formidable module, you can include the module in any application:
var formidable = require('formidable');
Let's create a form step by step.
Create a Node.js file that writes an HTML form, with an upload field:
var http = require('http');

http.createServer(function (req, res) {
  res.writeHead(200, {'Content-Type': 'text/html'});
  res.write('<form action="fileupload" method="post" enctype="multipart/form-data">');
  res.write('<input type="file" name="filetoupload"><br>');
  res.write('<input type="submit">');
  res.write('</form>');
  return res.end();
}).listen(8080);
Include the Formidable module to be able to parse the uploaded file once it reaches the server. When the file is uploaded and parsed, it gets placed on a temporary folder on your computer.
var http = require('http');
var formidable = require('formidable');

http.createServer(function (req, res) {
  if (req.url == '/fileupload') {
    var form = new formidable.IncomingForm();
    form.parse(req, function (err, fields, files) {
      res.write('File uploaded');
      res.end();
    });
  } else {
    res.writeHead(200, {'Content-Type': 'text/html'});
    res.write('<form action="fileupload" method="post" enctype="multipart/form-data">');
    res.write('<input type="file" name="filetoupload"><br>');
    res.write('<input type="submit">');
    res.write('</form>');
    return res.end();
  }
}).listen(8080);
When a file is successfully uploaded to the server, it is placed on a temporary folder. The path to this directory can be found in the "files" object, passed as the third argument in the parse() method's callback function. To move the file to the folder of your choice, use the File System module, and rename the file:
var http = require('http');
var formidable = require('formidable');
var fs = require('fs');

http.createServer(function (req, res) {
  if (req.url == '/fileupload') {
    var form = new formidable.IncomingForm();
    form.parse(req, function (err, fields, files) {
      var oldpath = files.filetoupload.filepath;
      var newpath = 'C:/Users/Your Name/' + files.filetoupload.originalFilename;
      fs.rename(oldpath, newpath, function (err) {
        if (err) throw err;
        res.write('File uploaded and moved!');
        res.end();
      });
 });
  } else {
    res.writeHead(200, {'Content-Type': 'text/html'});
    res.write('<form action="fileupload" method="post" enctype="multipart/form-data">');
    res.write('<input type="file" name="filetoupload"><br>');
    res.write('<input type="submit">');
    res.write('</form>');
    return res.end();
  }
}).listen(8080);
09 . URL Module 😴
We have already used the URL Module once in this tutorial, but we are going to quickly go through it again since it's a very important module. The URL module splits up a web address into readable parts. To include the URL module, use the require() method:
var url = require('url');
Parse an address with the url.parse() method, and it will return a URL object with each part of the address as properties:
var url = require('url');
var adr = 'http://localhost:8080/default.htm?year=2017&month=february';
var q = url.parse(adr, true);

console.log(q.host); //returns 'localhost:8080'
console.log(q.pathname); //returns '/default.htm'
console.log(q.search); //returns '?year=2017&month=february'

var qdata = q.query; //returns an object: { year: 2017, month: 'february' }
console.log(qdata.month); //returns 'february'
Now we know how to parse the query string, and we also know how to make Node.js behave as a file server. Let us combine the two, and serve the file requested by the client. Create two html files and save them in the same folder as your node.js files.
// AGE.HTML
<!DOCTYPE html>
<html>
<body>
<h1>Age</h1>
<p>My age is 20</p>
</body>
</html>
// LOCATION.HTML
<!DOCTYPE html>
<html>
<body>
<h1>Location</h1>
<p>I live in Delhi</p>
</body>
</html>
Create a Node.js file that opens the requested file and returns the content to the client. If anything goes wrong, throw a 404 error:
var http = require('http');
var url = require('url');
var fs = require('fs');

http.createServer(function (req, res) {
  var q = url.parse(req.url, true);
  var filename = "." + q.pathname;
  fs.readFile(filename, function(err, data) {
    if (err) {
      res.writeHead(404, {'Content-Type': 'text/html'});
      return res.end("404 Not Found");
    }
    res.writeHead(200, {'Content-Type': 'text/html'});
    res.write(data);
    return res.end();
  });
}).listen(8080);
Remember to initiate the file:
node index.js
Now, run the following on your browser and see the output:
localhost:8080/sdasnjdas (will return the 404 page)
10 . Events 💃
Node.js is perfect for event-driven applications. Every action on a computer is an event. Like when a connection is made or a file is opened.
Objects in Node.js can fire events, like the readStream object fires events when opening and closing a file:
var fs = require('fs');
var rs = fs.createReadStream('./demofile.txt');
rs.on('open', function () {
  console.log('The file is open');
});
Node.js has a built-in module, called "Events", where you can create-, fire-, and listen for- your own events.
To include the built-in Events module use the require() method. In addition, all event properties and methods are an instance of an EventEmitter object. To be able to access these properties and methods, create an EventEmitter object:
var events = require('events');
var eventEmitter = new events.EventEmitter();
You can assign event handlers to your own events with the EventEmitter object.
In the example below we have created a function that will be executed when a "scream" event is fired.
To fire an event, use the emit() method.
var events = require('events');
var eventEmitter = new events.EventEmitter();

//Create an event handler:
var myEventHandler = function () {
  console.log('I hear a scream!');
}

//Assign the event handler to an event:
eventEmitter.on('scream', myEventHandler);

//Fire the 'scream' event:
eventEmitter.emit('scream');
11 . Nodemailer 📧
The Nodemailer module makes it easy to send emails from your computer. It shall be installed using npm.
After you have downloaded the Nodemailer module, you can include the module in any application:
var nodemailer = require('nodemailer');
Now you are ready to send emails from your server.
Use the username and password from your selected email provider to send an email.
var nodemailer = require('nodemailer');

var transporter = nodemailer.createTransport({
  service: 'gmail', //WHATEVER SERVICE YOU ARE USING
  auth: {
    user: 'youremail@gmail.com',
    pass: 'yourpassword'
  }
});

var mailOptions = {
  from: 'youremail@gmail.com',
  to: 'myfriend@yahoo.com',
  subject: 'Sending Email using Node.js',
  text: 'That was easy!'
};

transporter.sendMail(mailOptions, function(error, info){
  if (error) {
    console.log(error);
  } else {
    console.log('Email sent: ' + info.response);
  }
});
This was all about the basics of Node.JS. There's much more to learn in Node.JS. There's a special NPM Module called Express.JS, but we'll learn about it in some other article.